Use Horizontal Node Autoscaling
Context
MetaKube Kubernetes clusters support horizontal node autoscaling out of the box. This tutorial shows how you can configure and activate it in your cluster. Node autoscaling also plays well together with horizontal pod autoscaling.
The node autoscaler supports scaling down to one single node. Scaling down to zero nodes is currently not supported.
Prerequisites
This tutorial requires a MetaKube cluster and access to it via kubectl.
Deploy an application
For easy cleanups we create a new namespace for our tutorial:
$ kubectl create namespace hna-tutorial
namespace/hna-tutorial created
For our tutorial we will deploy an NGINX Hello World to simulate the workload. To install the app run:
$ cat <<EOF | kubectl create -f -
apiVersion: apps/v1
kind: Deployment
metadata:
  namespace: hna-tutorial
  name: hello-app
spec:
  selector:
    matchLabels:
      app: hello
  template:
    metadata:
      labels:
        app: hello
    spec:
      containers:
        - name: hello
          image: nginxdemos/hello
          resources:
            requests:
              cpu: 500m
              memory: 700Mi
          ports:
            - containerPort: 80
EOF
deployment.apps/hello-app created
Check that the pod of the new application was created successfully and is running:
$ kubectl get pods --namespace hna-tutorial
NAME                           READY     STATUS    RESTARTS   AGE
hello-app-5c7477d7b7-n44wq     1/1       Running   0          9s
Note: we defined a fairly high CPU and memory requests for our pod. This ensures that we quickly get to the point where the scheduler is not able to schedule new pods due to insufficient resources, when scaling the deployment up.
Now let's manually scale the deployment, in a production scenario this can be done automatically using the horizontal pod autoscaler:
$ kubectl scale deployment/hello-app --replicas 15 --namespace hna-tutorial
deployment.extensions/hello-app scaled
When you list all pods, you should notice several pods being stuck in "Pending" state:
$ kubectl get pods --namespace hna-tutorial
NAME                           READY     STATUS    RESTARTS   AGE
hello-app-6f488fcdfc-6pj74   1/1     Running   0          13s
hello-app-6f488fcdfc-9bb8h   1/1     Running   0          13s
hello-app-6f488fcdfc-9bn8l   1/1     Running   0          13s
hello-app-6f488fcdfc-n44wq   1/1     Running   0          3m47s
hello-app-6f488fcdfc-dbhq9   0/1     Pending   0          13s
hello-app-6f488fcdfc-dvnsd   0/1     Pending   0          13s
hello-app-6f488fcdfc-g2m8n   0/1     Pending   0          13s
hello-app-6f488fcdfc-hm8kp   0/1     Pending   0          13s
hello-app-6f488fcdfc-kfx95   0/1     Pending   0          13s
hello-app-6f488fcdfc-m2n8x   0/1     Pending   0          13s
hello-app-6f488fcdfc-mcnbc   0/1     Pending   0          13s
hello-app-6f488fcdfc-q5fmn   0/1     Pending   0          13s
hello-app-6f488fcdfc-spk6p   0/1     Pending   0          13s
hello-app-6f488fcdfc-xr6r8   0/1     Pending   0          13s
hello-app-6f488fcdfc-zx8st   0/1     Pending   0          13s
Taking a closer look at one of the pending pods, you can see that the scheduling failed because of insufficient memory and CPU resources:
$ kubectl describe pod hello-app-6f488fcdfc-m2n8x --namespace hna-tutorial
Name:               hello-app-6f488fcdfc-m2n8x
Namespace:          hna-tutorial
Priority:           0
PriorityClassName:  <none>
Node:               <none>
Labels:             pod-template-hash=6f488fcdfc
                    run=hello-app
Annotations:        <none>
Status:             Pending
IP:
Controlled By:      ReplicaSet/hello-app-6f488fcdfc
Containers:
  hello-app:
    Image:      nginxdemos/hello
    Port:       80/TCP
    Host Port:  0/TCP
    Requests:
      cpu:        500m
      memory:     700Mi
    Environment:  <none>
    Mounts:
      /var/run/secrets/kubernetes.io/serviceaccount from default-token-6d8qc (ro)
Conditions:
  Type           Status
  PodScheduled   False
Volumes:
  default-token-6d8qc:
    Type:        Secret (a volume populated by a Secret)
    SecretName:  default-token-6d8qc
    Optional:    false
QoS Class:       Burstable
Node-Selectors:  <none>
Tolerations:     node.kubernetes.io/not-ready:NoExecute for 300s
                 node.kubernetes.io/unreachable:NoExecute for 300s
Events:
  Type     Reason            Age                 From                Message
  ----     ------            ----                ----                -------
  Warning  FailedScheduling  36s (x25 over 81s)  default-scheduler   0/5 nodes are available: 1 Insufficient memory, 5 Insufficient cpu.
This means we need to increase the capacity of our cluster by adding more nodes. This could be done manually through the MetaKube dashboard (see Manage number of worker nodes) or via the CLI (see Managing worker nodes over CLI). However, in this tutorial we will solve this automatically using the cluster autoscaler.
To do so, we have to create a scalable MachineDeployment in our cluster. You can either do this via the MetaKube dashboard by creating a new NodeDeployment and activating autoscaling:
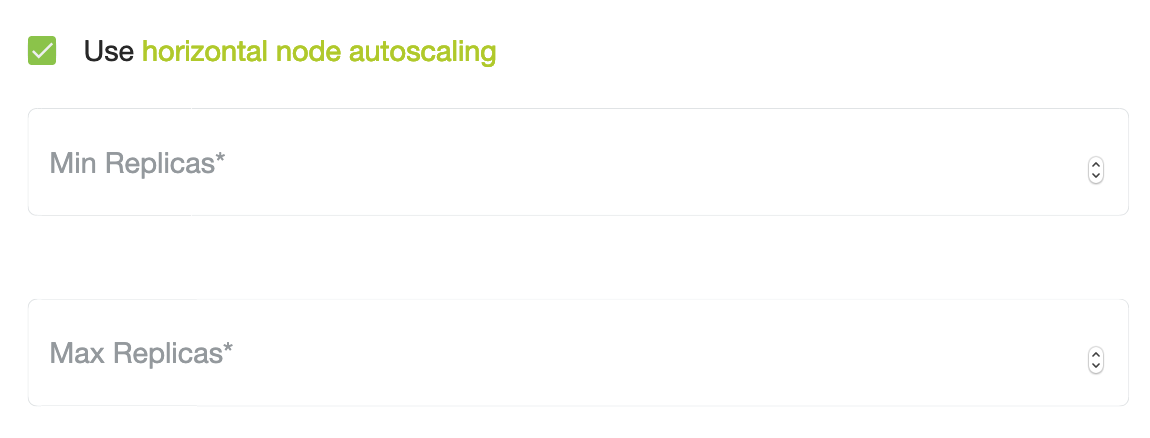
or with the CLI and kubectl:
# Choose the public key you want to deploy on the node
SSH_PUBLIC_KEY=$(cat ~/.ssh/id_rsa.pub)

# Getting the cluster name like this only works if you did not rename the
# context in the downloaded kubeconfig. If you did, choose the original name of
# the cluster (10 character alphanumeric string).
CLUSTER_NAME=$(kubectl config current-context)

# Set up the flavor for the node
FLAVOR="m1.small"

# Set up the correct region and availability zone
REGION="dbl"
AVAILABILITY_ZONE="dbl1"

OPERATING_SYSTEM="ubuntu"
IMAGE_NAME="Ubuntu Bionic 18.04 (2021-03-20)"
FLOATING_IP_POOL="ext-net"
K8S_VERSION="1.20.4"

cat <<EOF | kubectl apply -f -
apiVersion: cluster.k8s.io/v1alpha1
kind: MachineDeployment
metadata:
  annotations:
    cluster.k8s.io/cluster-api-autoscaler-node-group-min-size: "1"
    cluster.k8s.io/cluster-api-autoscaler-node-group-max-size: "15"
  name: scalable-machine-deployment
  namespace: kube-system
spec:
  replicas: 0
  minReadySeconds: 0
  selector:
    matchLabels:
      deployment: scalable-machine-deployment
  strategy:
    type: RollingUpdate
    rollingUpdate:
      maxUnavailable: 0
      maxSurge: 1
  paused: false
  template:
    metadata:
      labels:
        deployment: scalable-machine-deployment
    spec:
      providerSpec:
        value:
          cloudProvider: openstack
          cloudProviderSpec:
            availabilityZone: ${AVAILABILITY_ZONE}
            domainName: ""
            flavor: ${FLAVOR}
            floatingIpPool: ${FLOATING_IP_POOL}
            identityEndpoint: "https://api.${REGION}.cloud.syseleven.net:5000/v3"
            image: "${IMAGE_NAME}"
            network: metakube-${CLUSTER_NAME}
            password: ""
            region: ${REGION}
            securityGroups:
            - metakube-${CLUSTER_NAME}
            tenantName: ""
            tokenId: ""
            username: ""
          operatingSystem: ${OPERATING_SYSTEM}
          operatingSystemSpec:
            distUpgradeOnBoot: false
          sshPublicKeys:
          - "${SSH_PUBLIC_KEY}"
      versions:
        kubelet: "${K8S_VERSION}"
EOF
This will create a MachineDeployment which initially contains only a single machine, but can be scaled up by the cluster autoscaler to a maximum of 15 machines, if you have enough quota of course. For every machine a VM will be automatically created in OpenStack, provisioned and joined as a node to the Kubernetes cluster. For more details on MachineDeployments see Cluster Management API.
If you list all available machines, you can see that a few new machines have been automatically created by the autoscaler:
$ kubectl get machines --namespace kube-system
NAME                                           AGE
machine-metakube-fhgbvx65xg-7flj7              8d
machine-metakube-fhgbvx65xg-hmgd4              8d
machine-metakube-fhgbvx65xg-q287t              8d
scalable-machine-deployment-5c4cbbc47b-62wsd   4m
scalable-machine-deployment-5c4cbbc47b-zwrts   4m
Furthermore, the replica count of the MachineDeployment has been updated too:
$ kubectl get machinedeployment --namespace kube-system scalable-machine-deployment --output jsonpath="{.spec.replicas}"
2
After a few minutes, once the VMs are started and provisioned, new nodes will appear in the cluster as well:
$ kubectl get nodes
NAME                                           STATUS     ROLES    AGE     VERSION
metakube-fhgbvx65xg-7flj7                      Ready      <none>   8d      v1.12.2
metakube-fhgbvx65xg-hmgd4                      Ready      <none>   8d      v1.12.2
metakube-fhgbvx65xg-q287t                      Ready      <none>   8d      v1.12.2
scalable-machine-deployment-5c4cbbc47b-62wsd   Ready      <none>   2m58s   v1.12.2
scalable-machine-deployment-5c4cbbc47b-zwrts   Ready      <none>   2m30s   v1.12.2
When enough nodes have been added, the previously pending pods are now successfully scheduled and running:
$ kubectl get pods --namespace hna-tutorial
NAME                           READY     STATUS    RESTARTS   AGE
hello-app-6f488fcdfc-6pj74   1/1     Running   0          13s
hello-app-6f488fcdfc-9bb8h   1/1     Running   0          13s
hello-app-6f488fcdfc-9bn8l   1/1     Running   0          13s
hello-app-6f488fcdfc-n44wq   1/1     Running   0          3m47s
hello-app-6f488fcdfc-dbhq9   1/1     Running   0          13s
hello-app-6f488fcdfc-dvnsd   1/1     Running   0          13s
hello-app-6f488fcdfc-g2m8n   1/1     Running   0          13s
hello-app-6f488fcdfc-hm8kp   1/1     Running   0          13s
hello-app-6f488fcdfc-kfx95   1/1     Running   0          13s
hello-app-6f488fcdfc-m2n8x   1/1     Running   0          13s
hello-app-6f488fcdfc-mcnbc   1/1     Running   0          13s
hello-app-6f488fcdfc-q5fmn   1/1     Running   0          13s
hello-app-6f488fcdfc-spk6p   1/1     Running   0          13s
hello-app-6f488fcdfc-xr6r8   1/1     Running   0          13s
hello-app-6f488fcdfc-zx8st   1/1     Running   0          13s
This also works in the opposite direction: lets scale the deployment of the Hello World app down to a single pod:
$ kubectl scale deployment/hello-app --replicas 1 --namespace hna-tutorial
deployment.extensions/hello-app scaled
Now keep inspecting the number of pods, machines and nodes as described above. The number of pods will quickly drop to 1. After a couple of minutes you will notice that, nodes will get drained and removed from the cluster.
The cluster is not scaling down
Check if the autoscaler finds a candidate to remove. You should find this in the logs: Finding additional 1 candidates for scale down.
The following logs show, if the scale down succeeded.
Pods that use local storage volumes (e.g. emptyDir) prevent a node from being removed.
Fast evaluation: node <nodename> cannot be removed: pod with local storage present: redis-node-0The cluster is not scaling up
A successful scale up message looks like this: Scale up in group MachineDeployment/kube-system/node-deployment-name finished successfully in 4m4.669938652s
Normally, it takes around 10 minutes for a new node to join the cluster.
Check if there are new machines created:
kubectl -n kube-system get machinesIf there is a machine older than 10 minutes which does not have an IP yet, look at the events of the machine to find the issue.
kubectl -n kube-system describe machine <name>Possible issues are that your quota is not enough or the cloud credentials in your cluster are wrong. Check Update a cluster's cloud credentials if you see authentication errors in the events.
Clean up
Delete the MachineDeployment to remove the created machines and VMs:
$ kubectl delete machinedeployment --namespace kube-system scalable-machine-deployment
machinedeployment.cluster.k8s.io "scalable-machine-deployment" deleted
Delete the namespace:
$ kubectl delete namespace hna-tutorial
namespace "hna-tutorial" deleted